This tab is used to configure our AI Agent settings.

This tab contains two columns(name, value)

Latest Release settings tab features:
1. Enable microphone: If you want to enable the speech service, use this feature. It will take a true or false value. The default value is false. A microphone button will now show up on the web agent where you can talk instead of typing. This feature is only available on web based agents.
Syntax: speech
2. Enable video avatar: This key is used to customize the video voice. The value can be any valid voice name accepted by Gooey.
Syntax: voice
For finding voices, go to this website: https://gooey.ai/compare-text-to-speech-engines/?run_id=jj3vkot4&uid=fm165fOmucZlpa5YHupPBdcvDR02

1. Click on down arrow in front of settings as shown in above diagram
2. Select the provider
3. Pick the voice name as shown in below image
4. While setting the voice, put provider name colon(:) voice name.For example, for given selected voice it should be, elevenlabs:Dave

1. Click on down arrow in front of settings as shown in above diagram
2. Select the provider
3. Pick the voice name as shown in below image
3. List modes: This accepts the values numbered or sentence. It is used only for SMS and WhatsApp. If the value is 'numbered,' it will use a numbered list. If the value is 'sentence,' it separates list items with a comma. The default list mode is 'numbered
Syntax: listmode


4. Catch all questions: If the AI doesn't know the answer, then you can set a question to jump to as a catch all condition. This is useful for instances when you want to control what happens if the agent doesn’t know what to do. The value is the variable name, from the questions tab of the question that you want to jump to.
Syntax: catchall
5. Open the agent automatically: This setting prevents the agent from opening automatically. The default behavior is true.
Syntax: openAutomatically
6. Full screen agent: If you want to see the agent in full screen, set this to "true". The default value is "false.". This option cannot be combined with the document option.
Syntax: fullscreen

7. Document: If you want to use Markdown in the AI Agent preview page, put the value as the public Google Docs URL.
Syntax: document

Here is an example of how the document feature looks

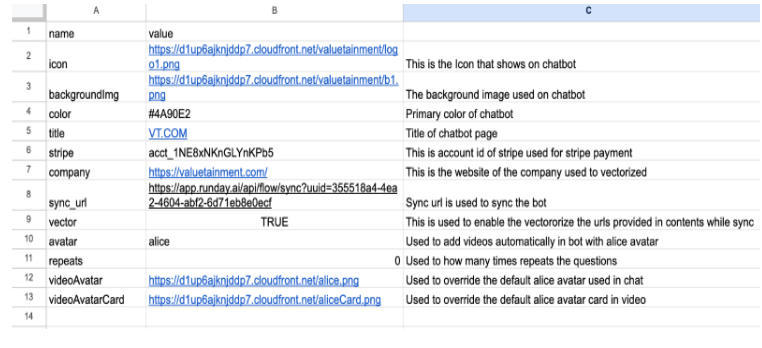
Below is an example of how a settings tab could look with some of the features listed above:

Guide to Adding and Triggering a Webhook:
To trigger a webhook following a specific question, you need to set the type as 'webhook' for that question in the questions tab.

eg. Here, webhook will trigger once a user given their email address.
To customize the webhook URL, the data to be sent, and the headers, you need to specify these in the settings tab.It contains 3 keys:
1] webhook_url :- This is used to specify the webhook URL that needs to be triggered. This is a required property.
2] webhook_headers :- If you want to specify request headers, such as contentType and others, you can do so here. This is a required property.
3] webhook_body :- If you want to send some data or message to webhook in body you can specify here. This is a optional property
If you want to use the values of variables from questions, you can simply specify them using @variable_name, as shown in the example below.
Adding different variations of messages:
If you want to add different variations of a message, you need to add a pipe between the two variations.

